
Description
The Bondtech Mini is a replacement extruder for the Wanhao i3 and has a few features that make this a good upgrade choice if you are looking for a new extruder. The Bondtech Mini has a Dual-Drive gear setup that grips the filament from both sides which makes this a good choice if you are using TPU or other flexible filaments. The smaller diameter of the gear also increases the torque and resolution by about 50%.
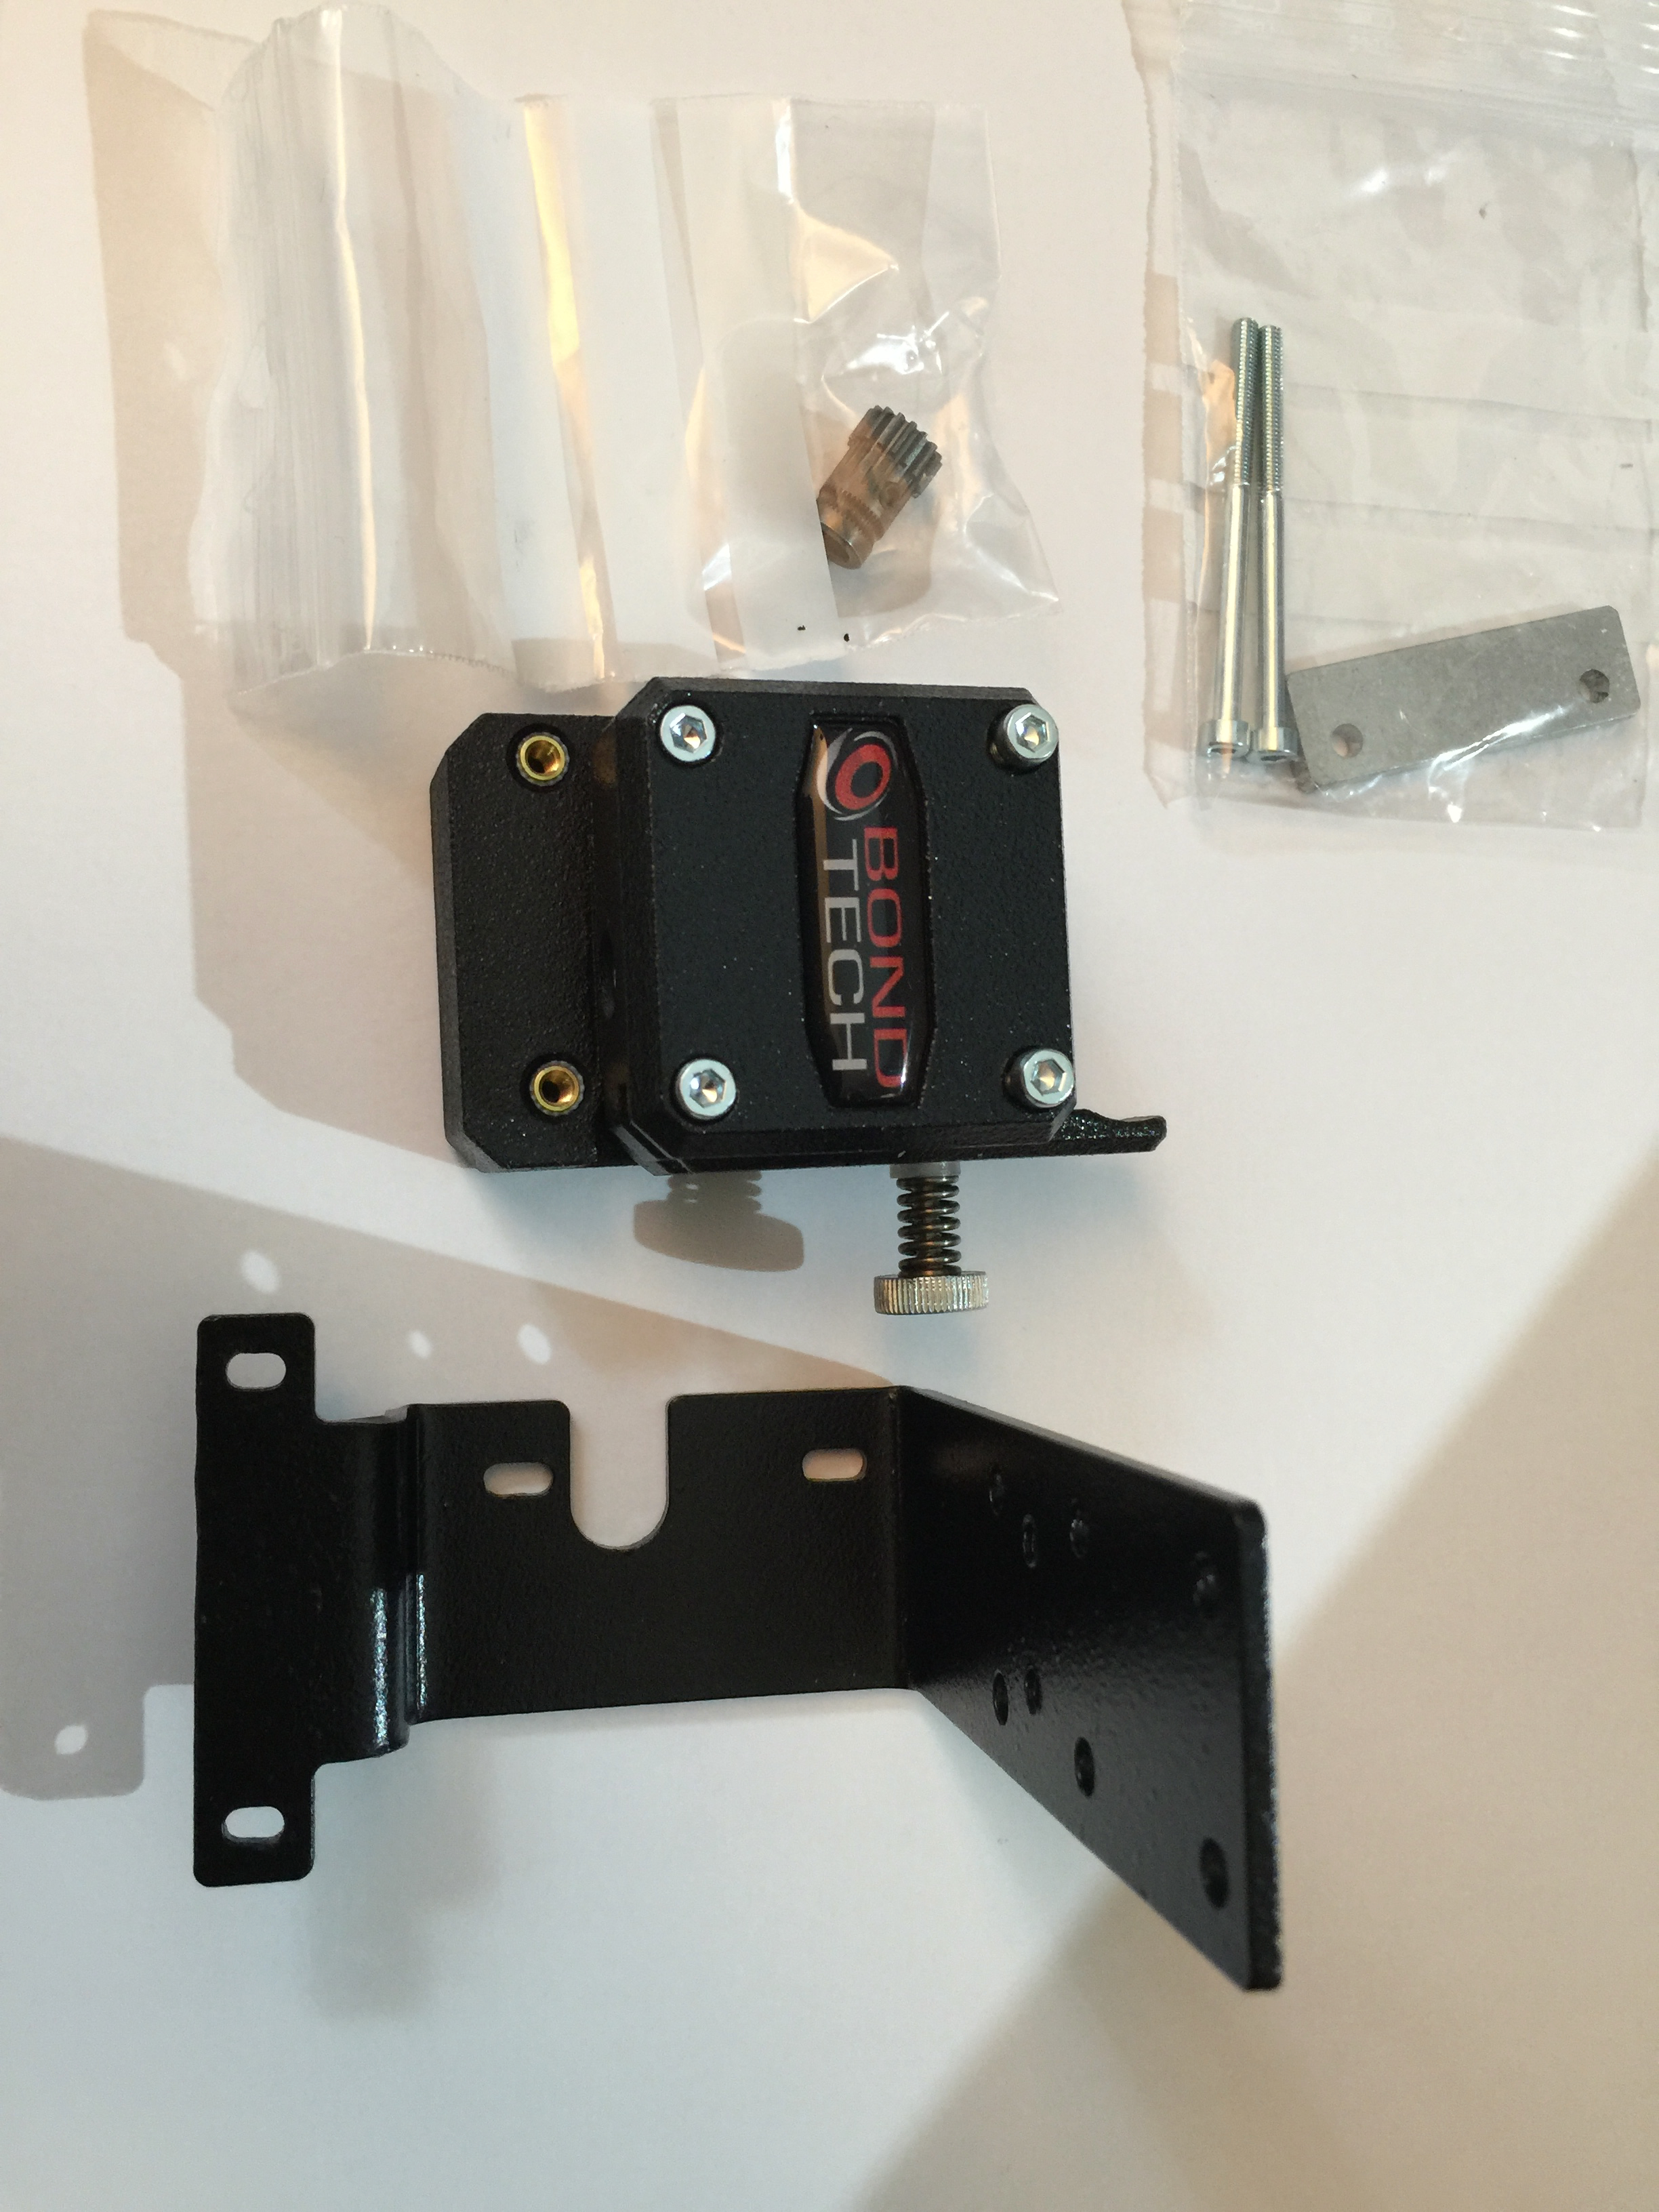
Kit Contents
It is recommended that you also order the modified mounting bracket to make installation easier, otherwise you will need to modify your existing bracket some to make the extruder fit. The kit consists of the following parts (you will be using your existing stepper motor) :
- Hardened steel drive gears
- Extruder housing in nylon with threaded inserts
- Hardened ground shaft (for the gears)
- Mounting bolts (M3x45mm)
- Needle bushings (for the lever gear)
- Shim (to space the heatsink and fan off the cooling block)
Bondtech i3 Kit (and optional Bracket)
Documentation
The documentation for the Bondtech Mini was preliminary at the time I installed the kit but has since been updated and contain step by step instructions and a template if you will be modifying your existing mounting bracket (will require some extra tools). Check the website for updated documentation since the link I show may be changed in the future.
Installation
The installation was pretty straight forward. The existing extruder needed to be removed and then the stepper motor needs to be removed because it will be reused with this kit. Set everything aside except for the original plastic lever, plate and drive gear since these will be replaced with the Bondtech Mini parts. After removing all the parts I had to remove the original mounting bracket so I could install the modified Bondtech bracket (I didn’t feel like cutting up the original). Once the bracket was installed I went to the next step of installing new Bondtech primary gear on the motor shaft (don’t set the setscrew all the way since you will need to align it later).
Assembly of the Hinge part was next and pretty straight forward. This consisted of installing the secondary gear and bushings into the recessed part of the hinge and securing in place with the short shaft. The back and front housings were installed on the original motor and the lever assembly installed on the housing. Next the gears need to be aligned with the filament path which was straight forward and easy to do.
The mounting bracket installs the same way as the original and while I was at it i upgraded my X bearing blocks to the new longer ones. The following step is the only tricky part of the installation. The heater block needs to be rotated 180 because of the design of the Bondtech Mini which involves heating up the assembly and unscrewing the nozzle and heatbreak tube then flipping the heat block over and reinstalling the nozzle and heatbreak tube. Be sure you are careful with the thermistor and heater wires (they break easily) and do not touch the parts while hot. Follow the instructions carefully since this is the part that was confusing to me (again, I had preliminary installation instructions).
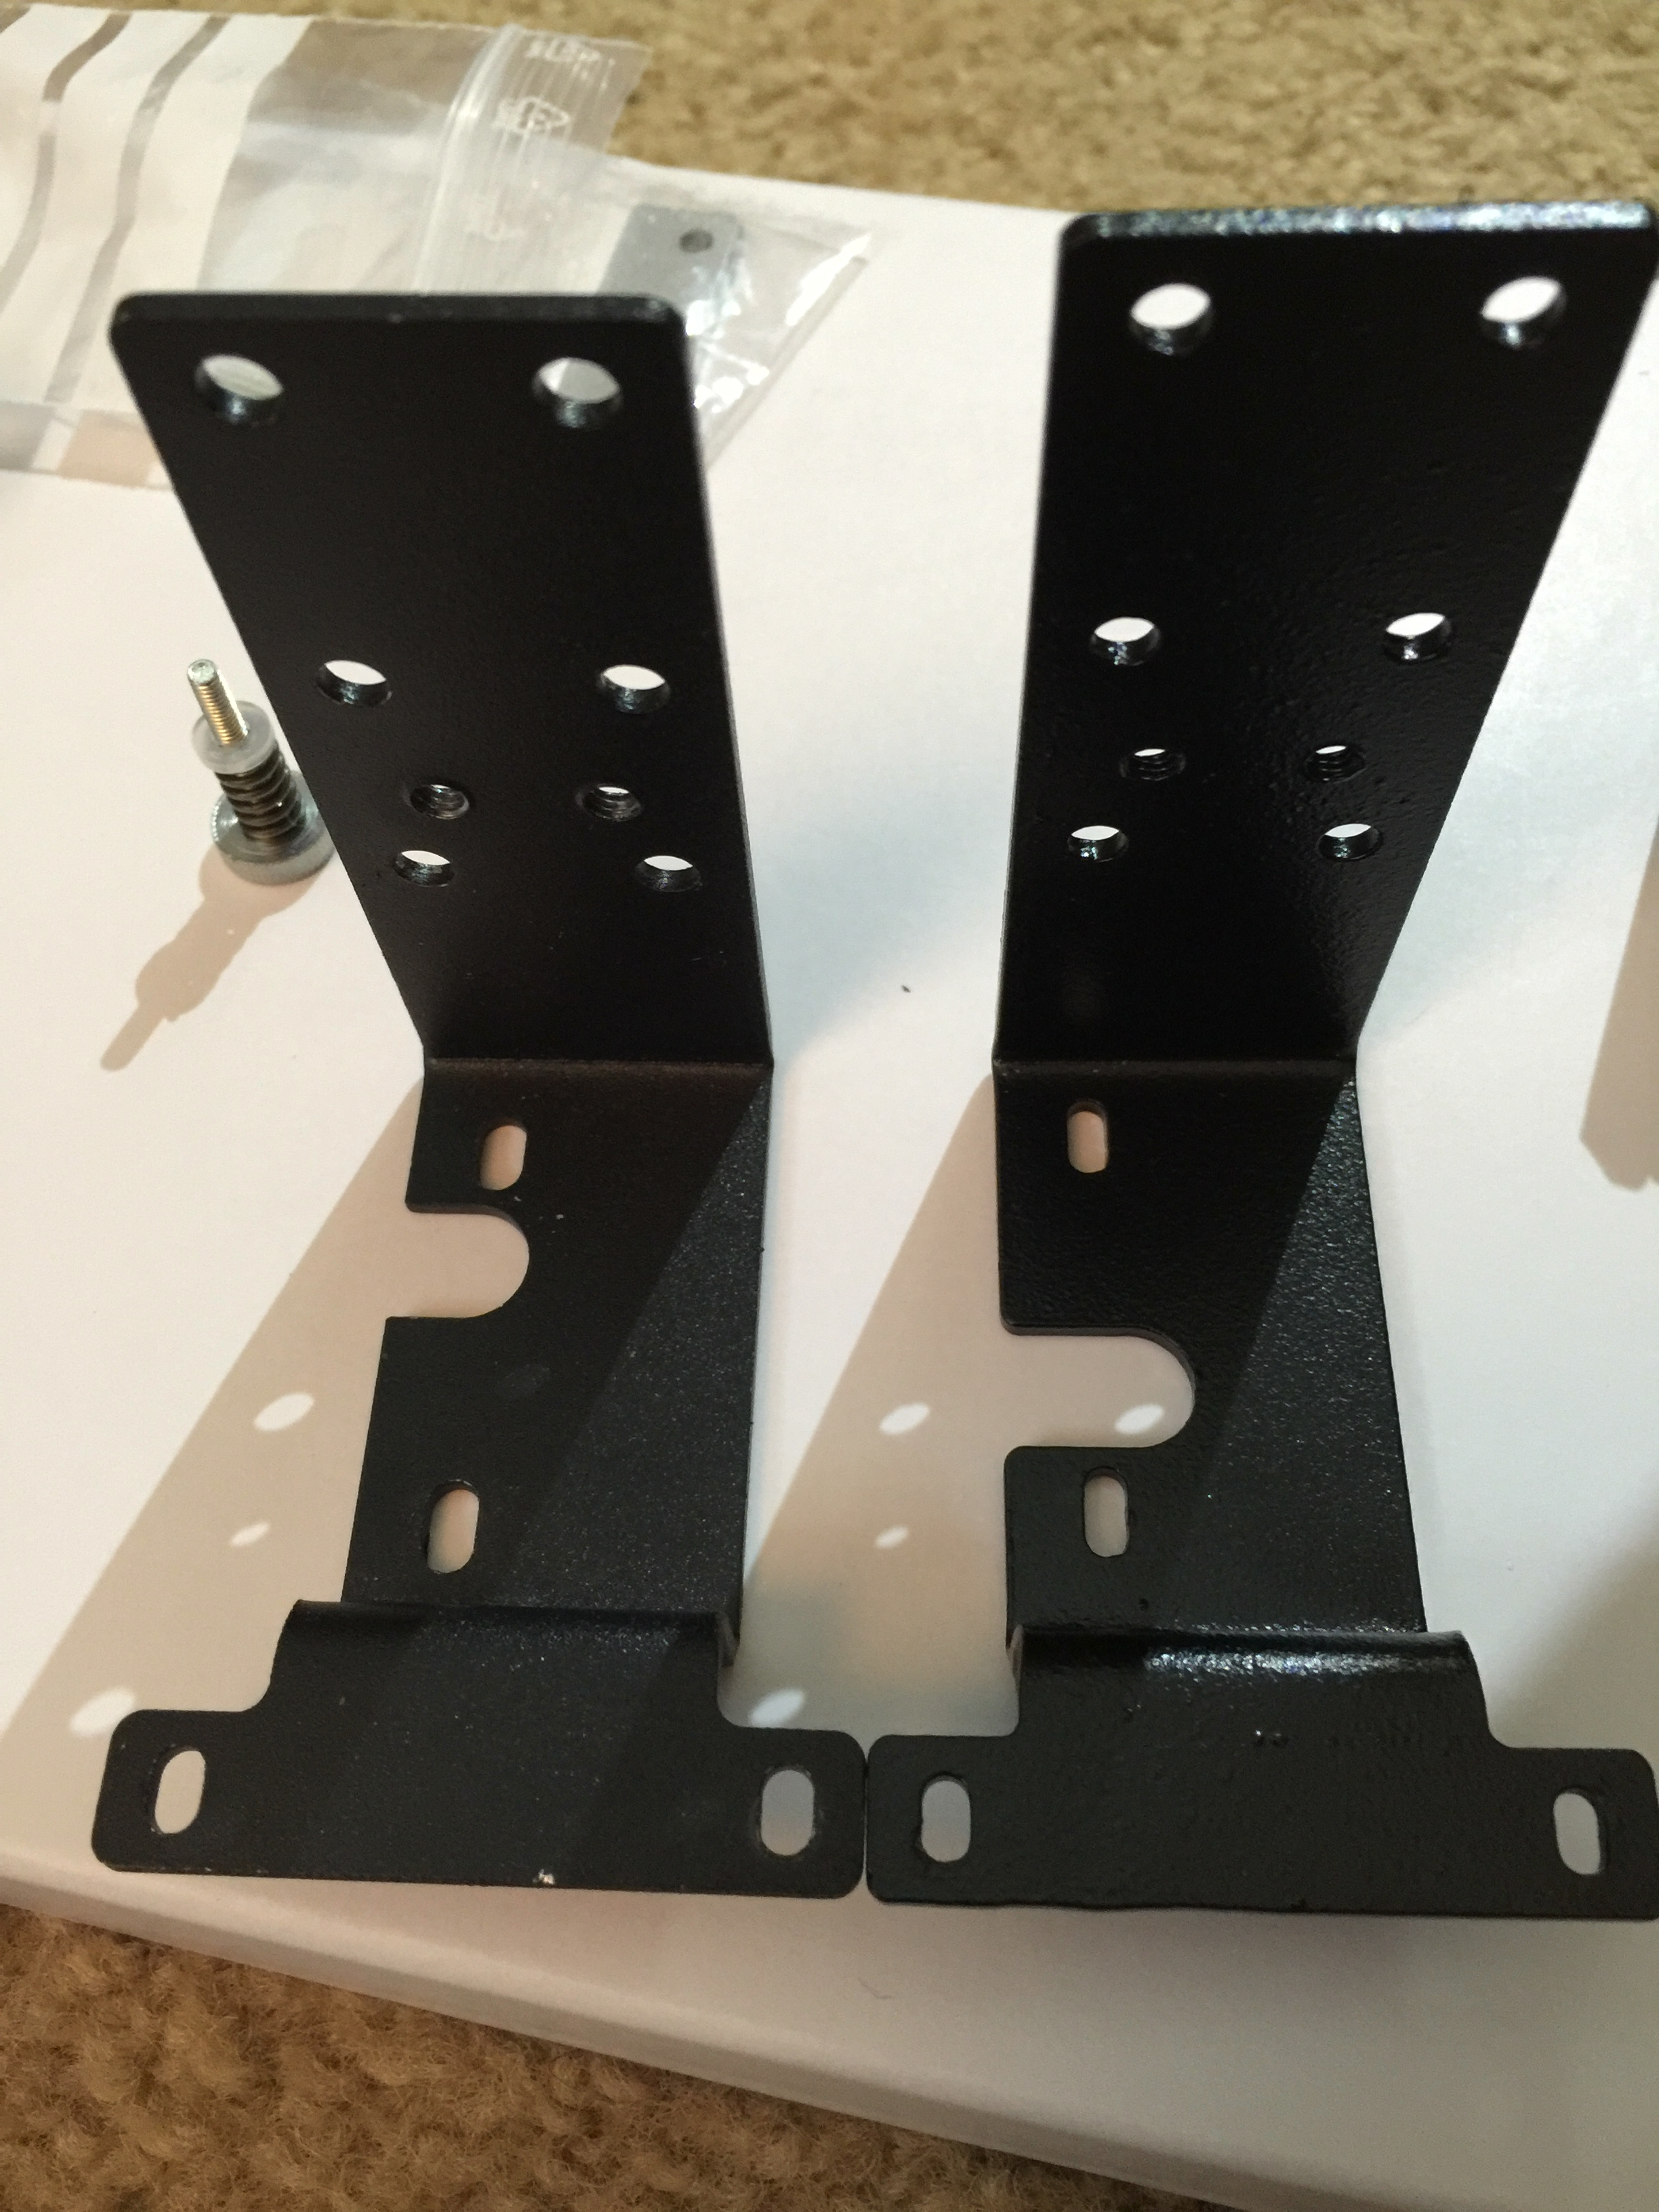
Bondtech i3 Bracket
Finally assembly went smoothly. The original cooling bar mounts to the new (or modified) bracket the same way as before. The heat sink and fan are spaced off the cooling bar using the included shim (due to the depth of the Bondtech housing). The fan and heatsink are secured through the cooling block and Bondtech housing into the stepper motor using the included longer M3 screws. The last step is to reverse the direction of the stepper motor since the drive gears operate backwards from the original. If you happen to have compiled your firmware yourself you can just invert the extruder direction in firmware and re-flash the controller board and if that is not possible you will need to remove a few wires from the stepper motor connector and flip them around (see Bondtech Instructions).
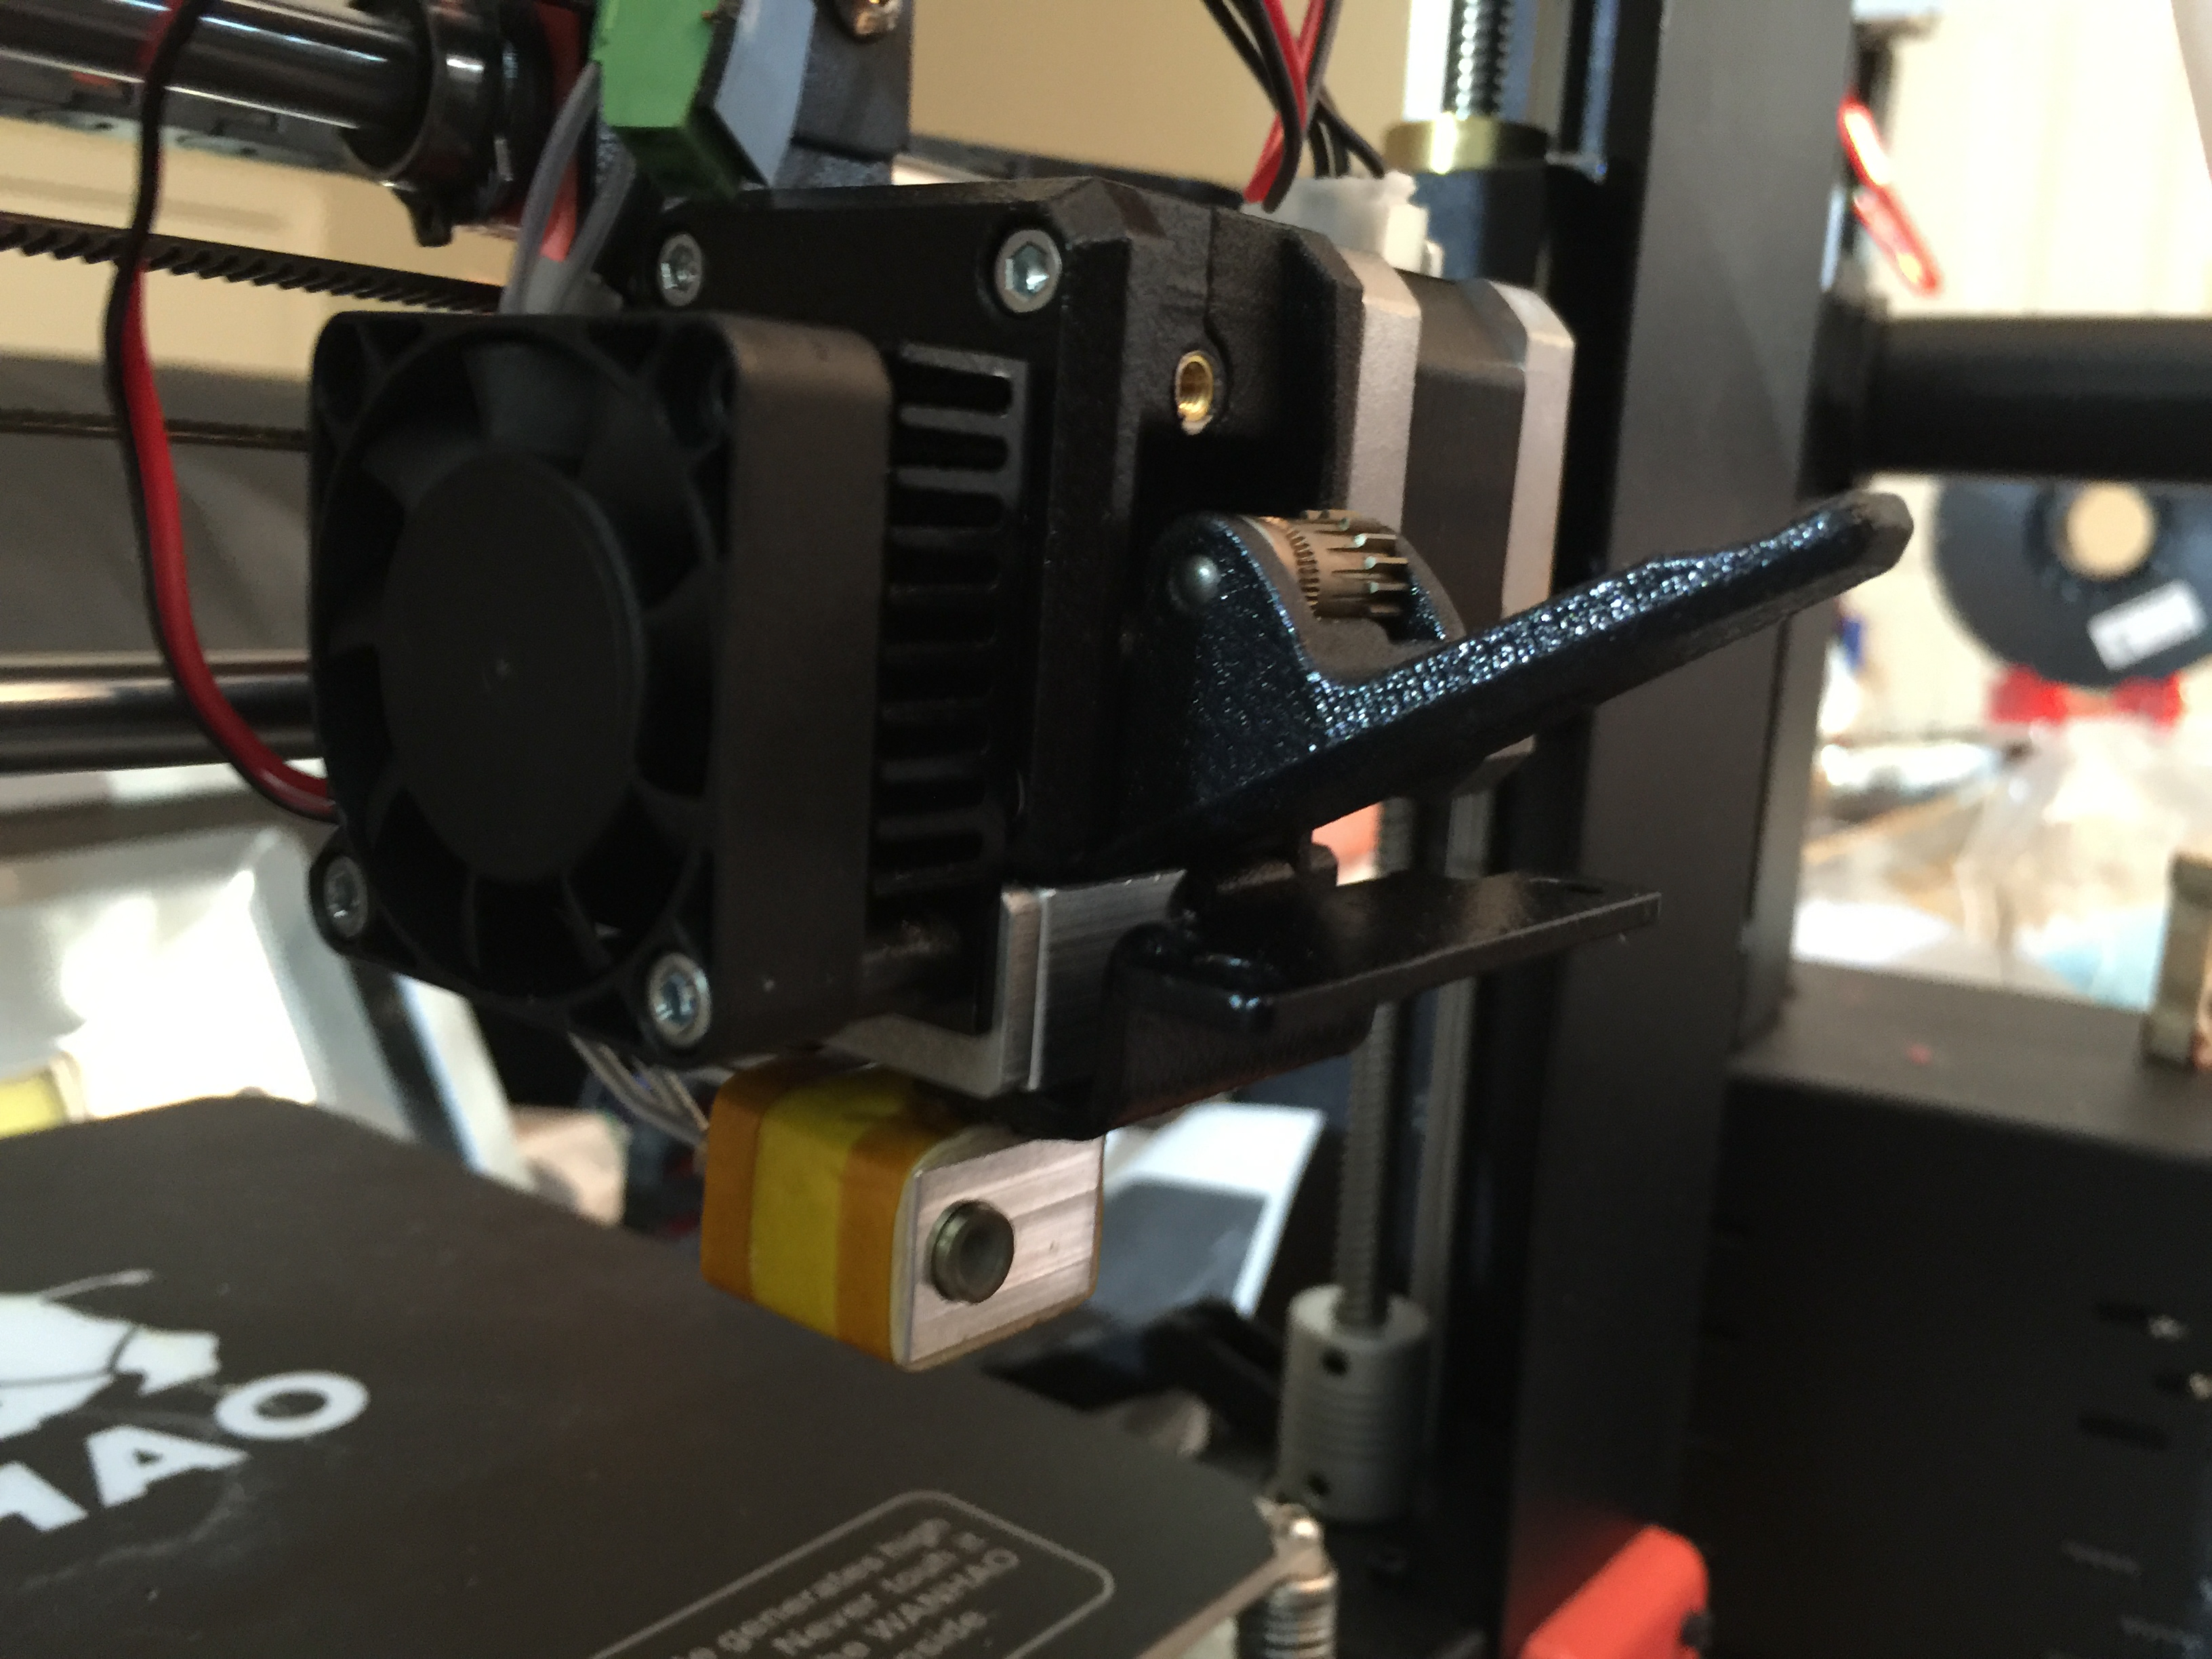
Bondtech Installed
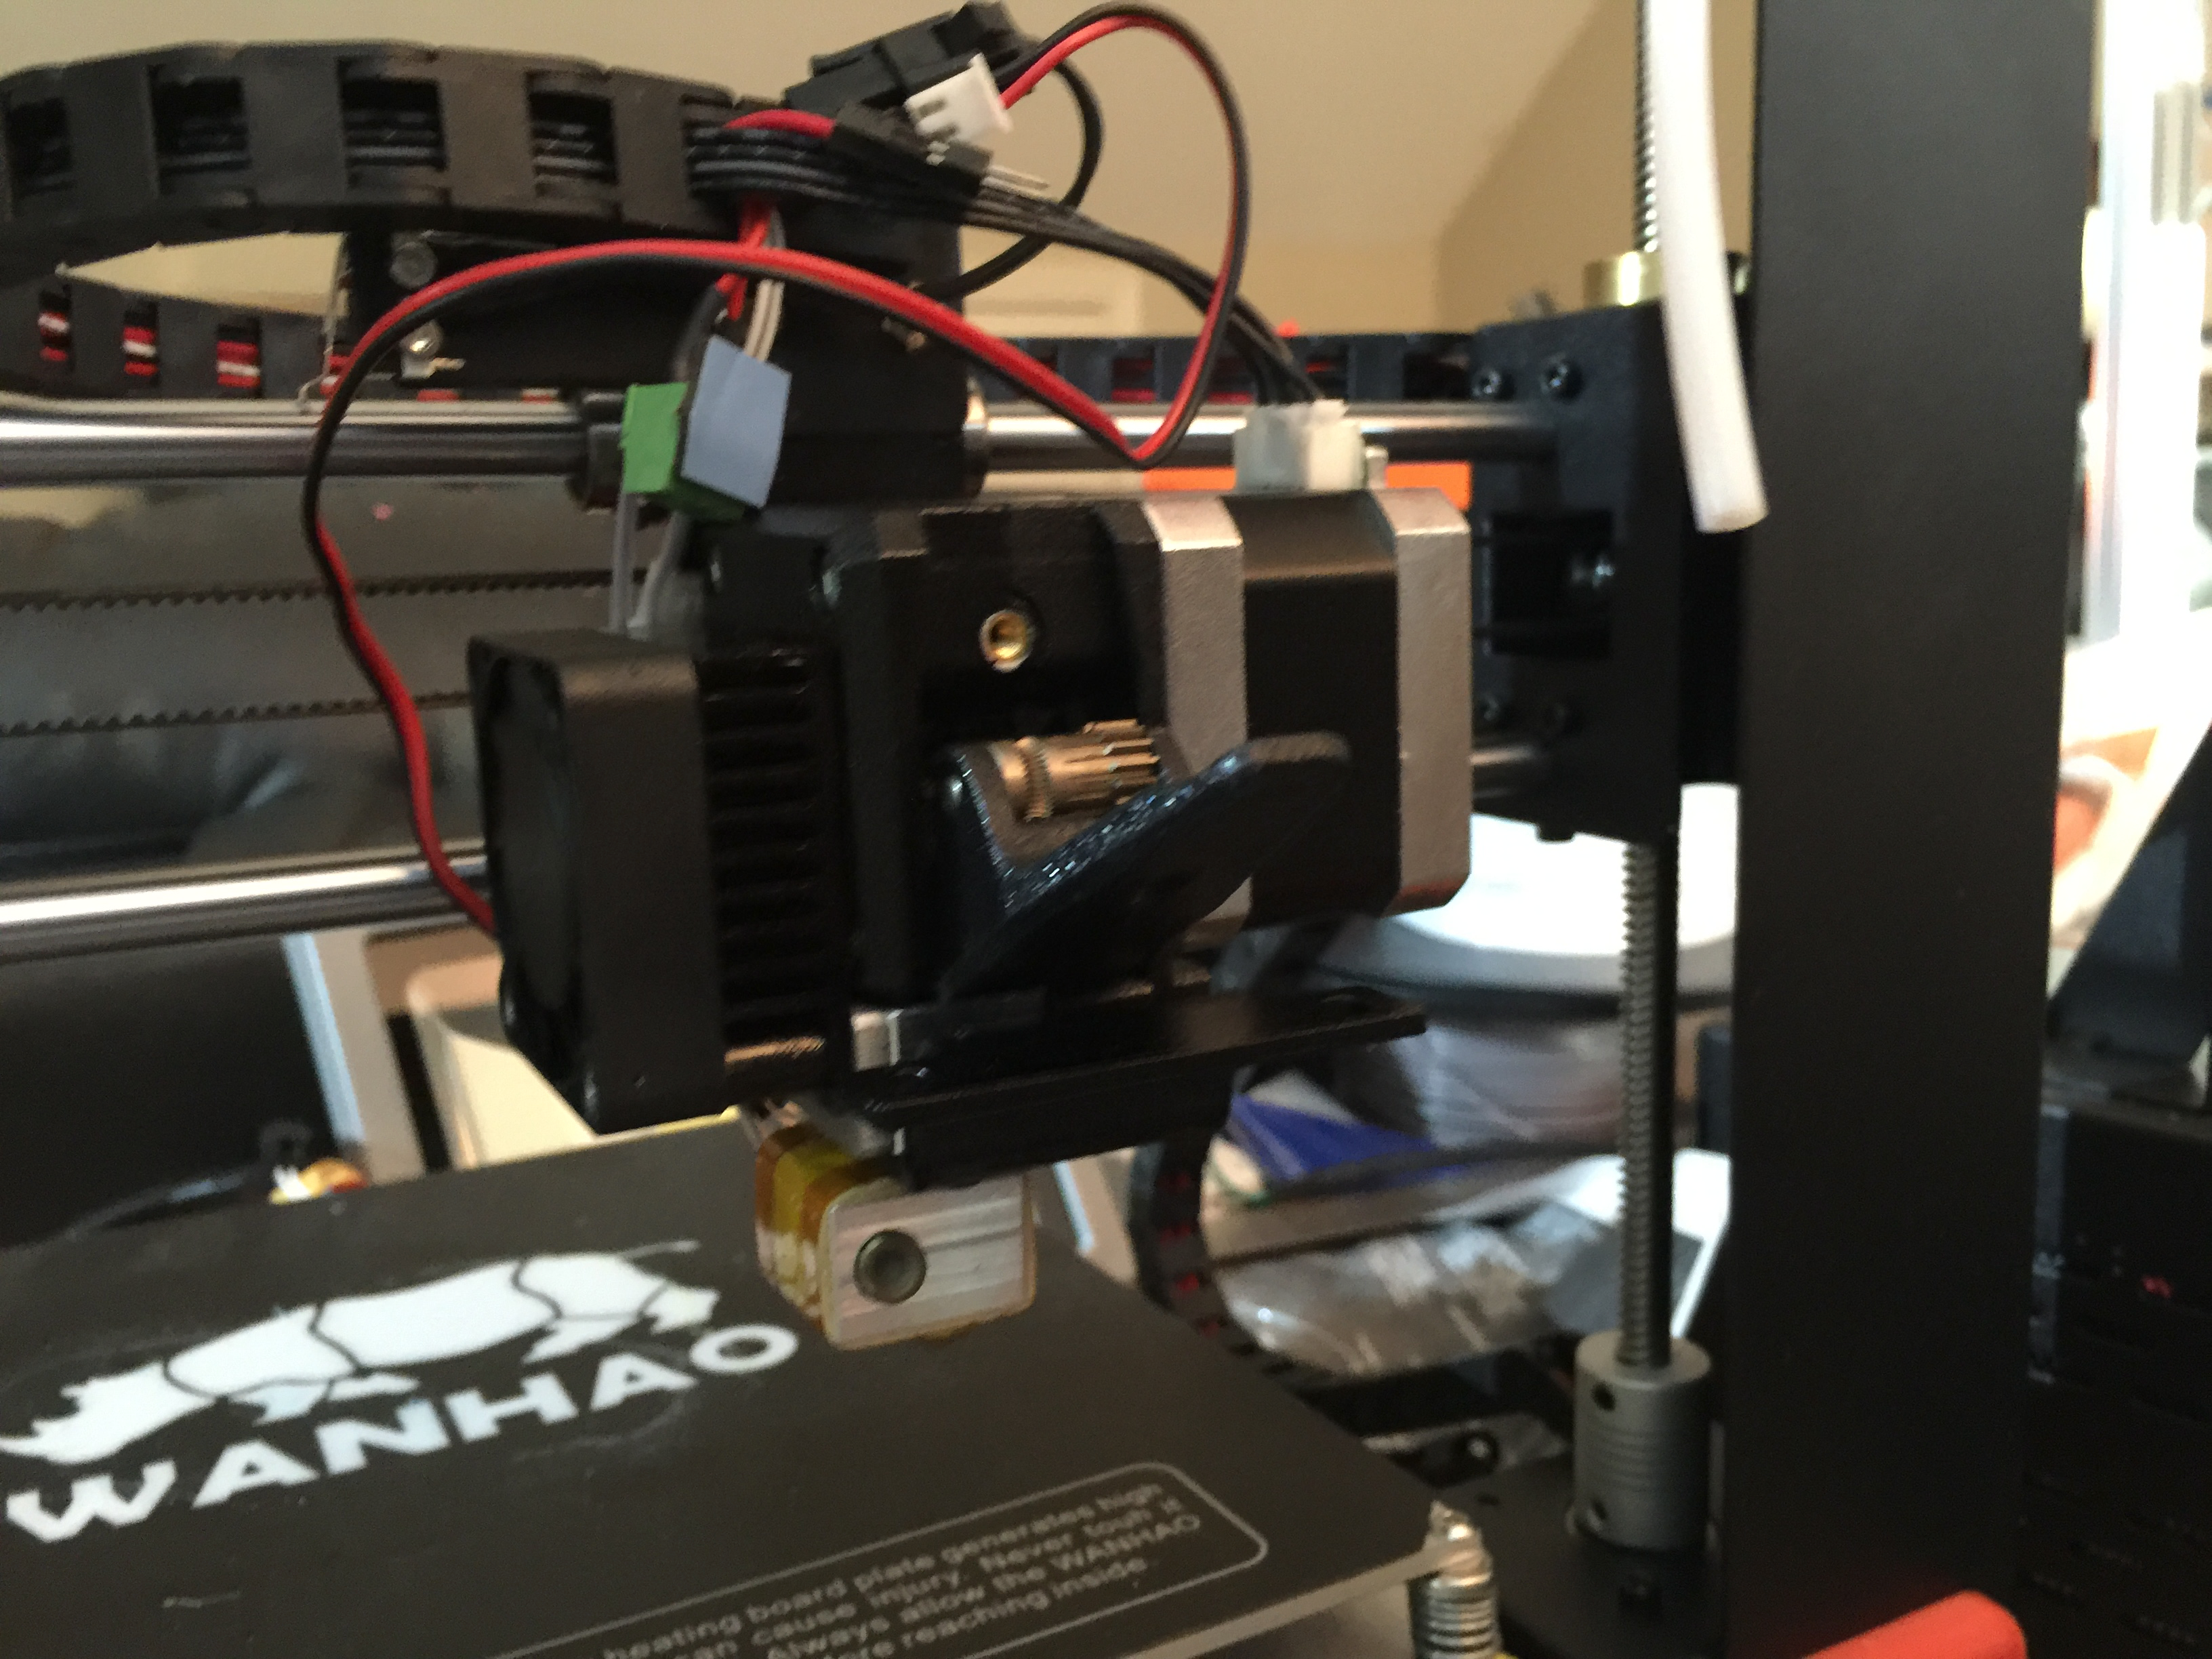
Bondtech Installed
Firmware Changes
Your printer firmware will need to have the EEPROM settings changed to update the Extruder Steps per MM so it will be correct for the new smaller diameter high-torque drive gears. The new ESteps will be changed to 140 from the original 96 (or 105).
Final Thoughts
I found the installation went smoothly after studying the instructions a couple of times. I highly recommend that you go ahead and purchase the optional mounting bracket to make installation easier unless you just like hacking on stuff. The installation is a little more advanced compared to other extruder mounting due to the changes that need to be made to the hotend and stepper motor wiring. If you ever had issues feeding filament with the OEM extruder then this extruder has a big advantage with the dual high torque gears that grip the filament from both sides and push it downward to the hotend. It took everything I threw at it and I only had issues with one new filament (X60) but that could be related to my hotend setup and not the extruder since the filament was feeding but getting jammed in the hotend. The only downside I found with the Bondtech Mini was the loss of about 15mm from the right side of the bed due to the added width of the extruder setup.
Where to purchase
The Bondtech Mini for the Wanhao I3 can be purchased directly from Bondtech or any authorized resellers.