
Description
The D7 is a good printer but has been seeing some damage from shipping and a few QC mistakes. This list will cover some known issues that should be checked before printing. A few of these involve removing the cover from the base of the D7 unit.
Things to Check
- First check to see that the LCD screen is intact and has no cracks. The new units seem to have the edges of the LCD taped down and should be left in place unless the tape is covering too much of the LCD and in that case just move the tape over some. This helps hold the LCD down when the bed moves and creates suctions during the peeling of the part from the FEP. If you have to replace the LCD here is the PDF with instructions.
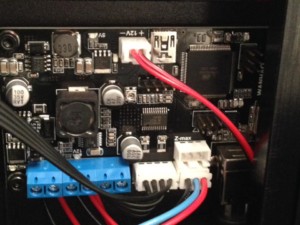
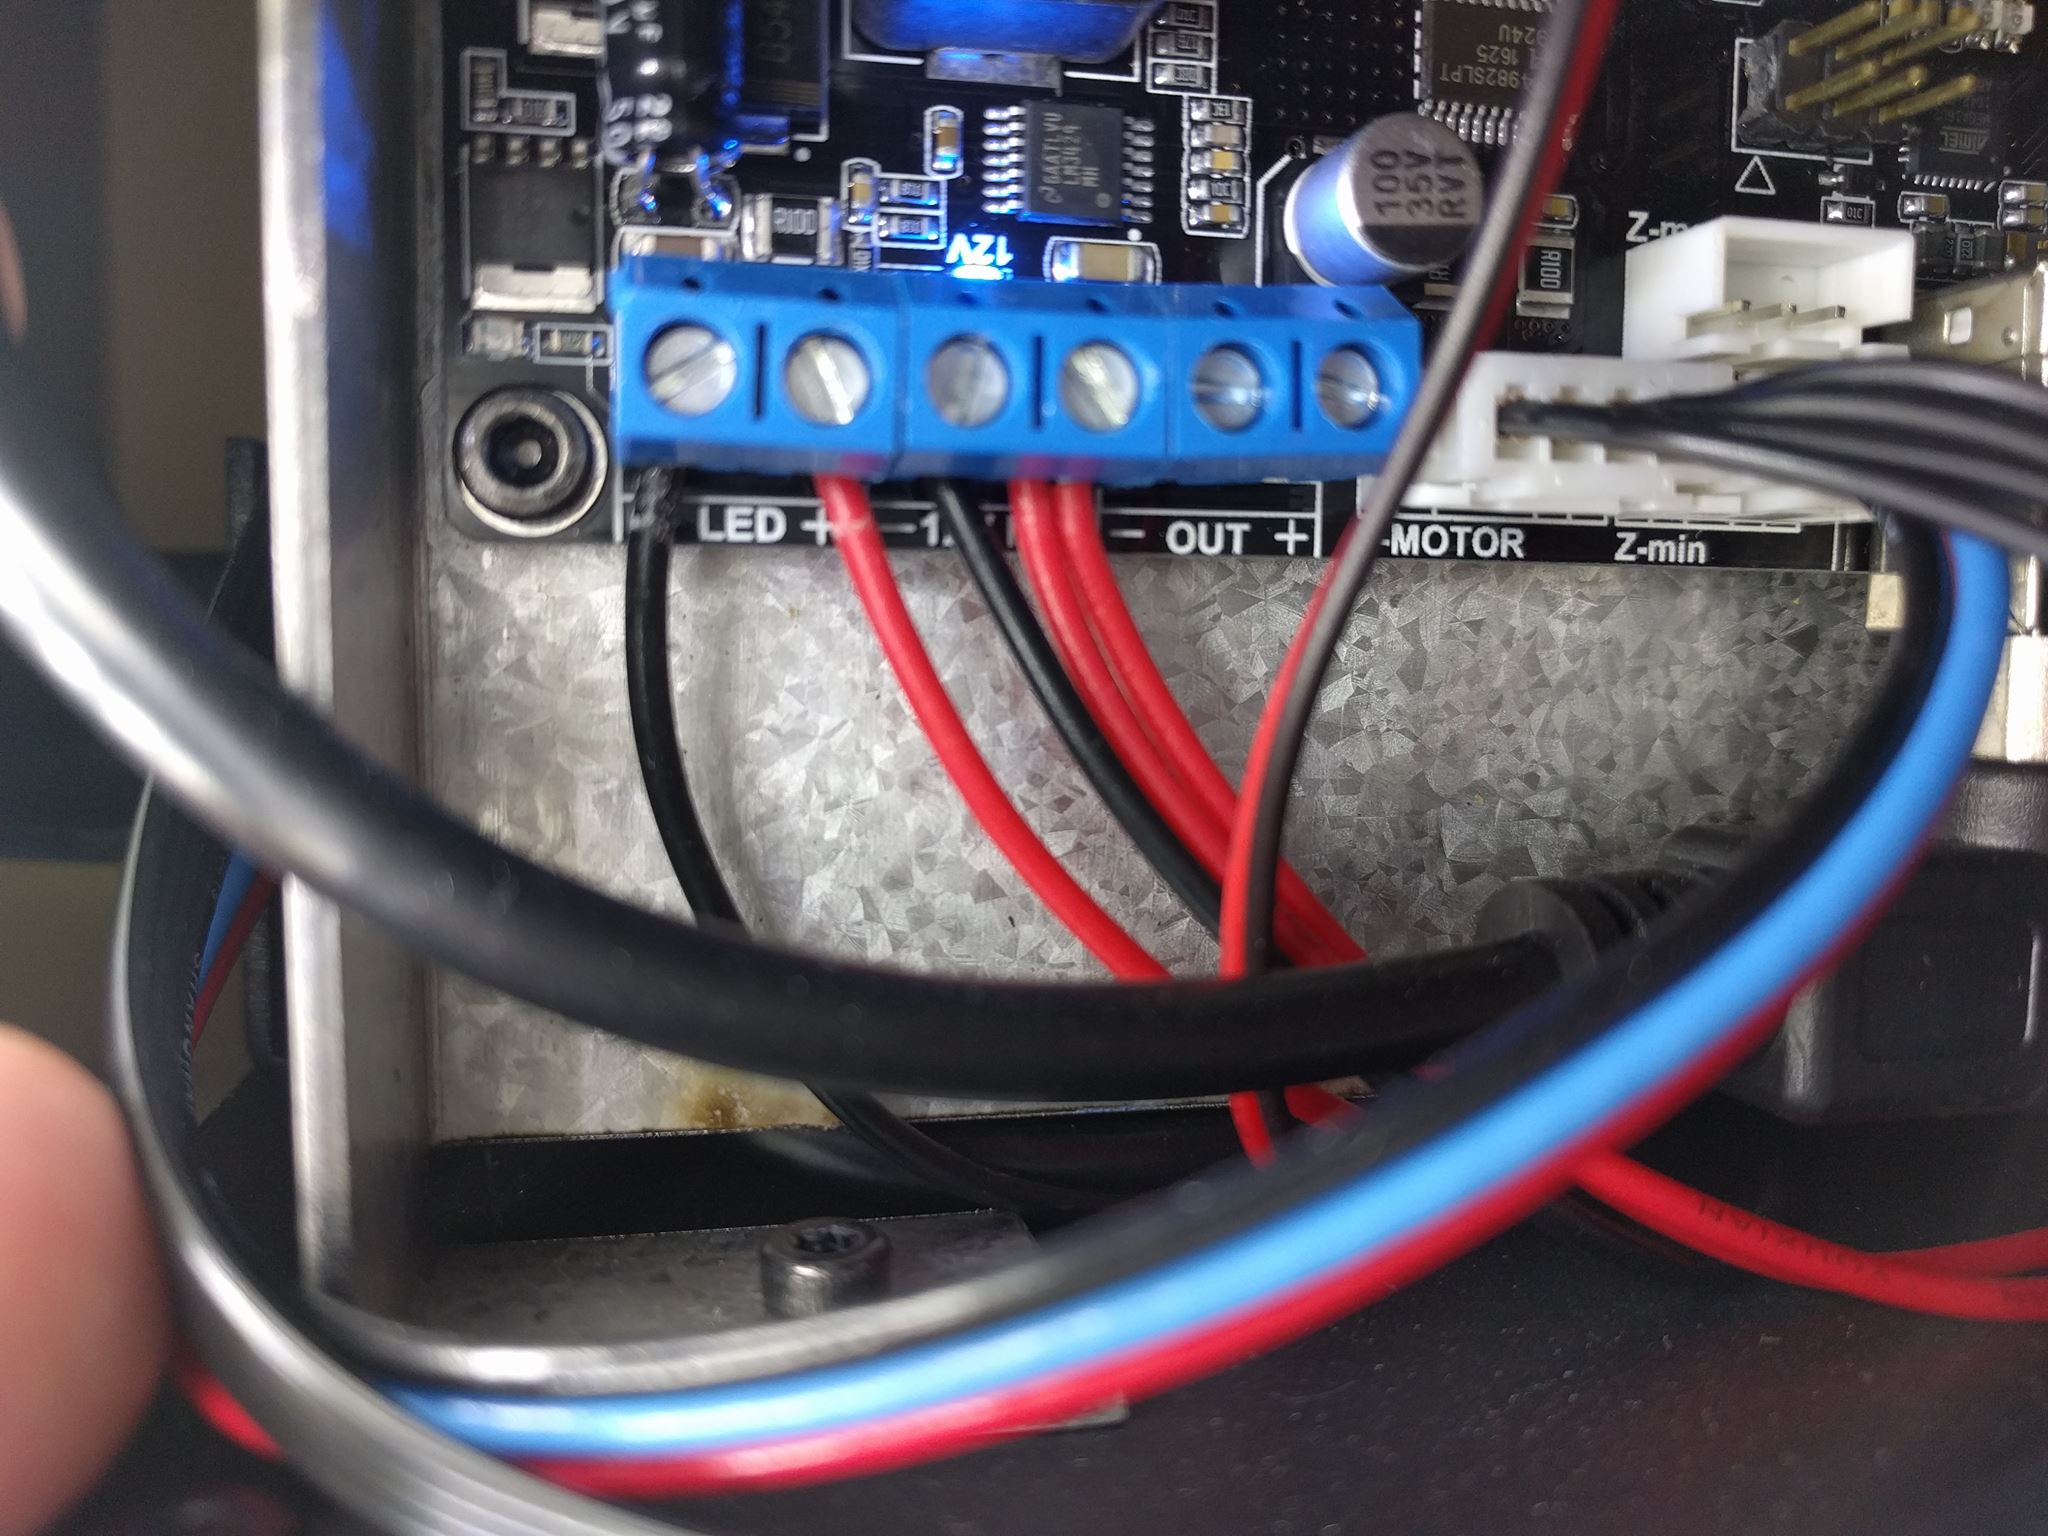
- Check the UV Fan connection on the main board. Make sure the Black wire is going to the left 12V- pin on the connector middle top of the controller board and that the Red wire is going to the 12V+ pin. See the following photo for an example of how it should look.

- Check that all the wires going into the terminals are tight (do a simple tug test by pulling on the wire and seeing if it comes out easily).
- Do the UV power tab mod so there is no chance the tabs will short on the heat sink. See this Wanhao document for instructions on how to do this or watch this youtube video.
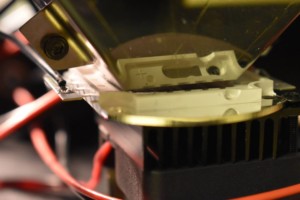
- Check that the metal reflector is not touching the top of the UV LED. Sometimes the left side rests on top of the LED but can be fixed by bending the tab on the top of the metal shield where it attaches to the bottom of the D7 base.
- Double check that all USB and HDMI cables are plugged in all the way.
- Check that the Z Stepper motor connector is plugged into the controller board all the way (the 4 pin connector with black wires in the photo below.


Power on the unit and configure your slicer / PC or Nanodlp so you can test the next items. You will need to test for UV LED function, LCD display and Z movement.
- Remove the bed / plate from the D7 so there is no chance of damaging those during the next test.
- In either your control software or Nanodlp find the Z control tab and click the Home Z button (To Floor in nanodlp). The Bed should start moving towards the bottom VAT / LCD area. You can test the Z Min Endstop by putting a piece of paper or other object in between the black U shaped sensor on the Z Endstop (should have a red light on it towards the back right corner of the D7). As soon as you block the path of the sensor the Z should stop moving and go the opposite direction for a few mm then start to move back down again. Block the sensor again and the Z should stop moving. This tests that the Z end stop is working correctly.
- Go ahead and click on Home Z or Move to Floor again and let the Z finish homing.
- Next click on the move buttons for Z and move it up and make sure it moves without binding. If your threaded rod is extremely bent you can use a flex coupler to connect the threaded rod to the stepper motor which will help with z wobble.
- Next test the UV LED using the gcode terminal enter in: M106 then click Send and the UV LED should come on. Send M107 to turn the UV back off.
- Check the LCD by showing a layer on the LCD (slice and simulate a print) or if using nanodlp use the “Dynamic Calibration” image to display a test image full screen. If you have any distortions in the LCD then you can try and troubleshoot using the information on the LCD troubleshooting page or contact Wanhao for assistance.

Dry Run Test
At this point I would slice an STL file and do a dry run test print without the VAT or Bed in the printer so you can see if it is displaying the images correctly. Once you are satisfied with the test move on to actually printing an object.
Videos
Here are some user videos that may also help.