
Octoprint on Raspberry Pi
Description
Octoprint is software that runs on a Raspberry Pi allowing you to print, monitor the status of your print, and control your printer over a network connection using a web browser. See the Octoprint site to download the software. Print a Pi case for your i3 from Thingiverse. If you want to try building your own install from source, I would recommend following the instructions on the Github page.
Printer Settings
Once you have Octoprint running and physically connected to the i3 with a USB cable, click on settings and configure as follows.
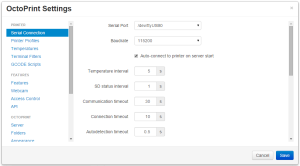
- Serial Connection
Your Serial port may be different depending on other peripherals and settings. Other settings on this tab should be left at default, but you may find that you need scroll all the way down and check the box for “Ignore any un-handled errors from the firmware.”
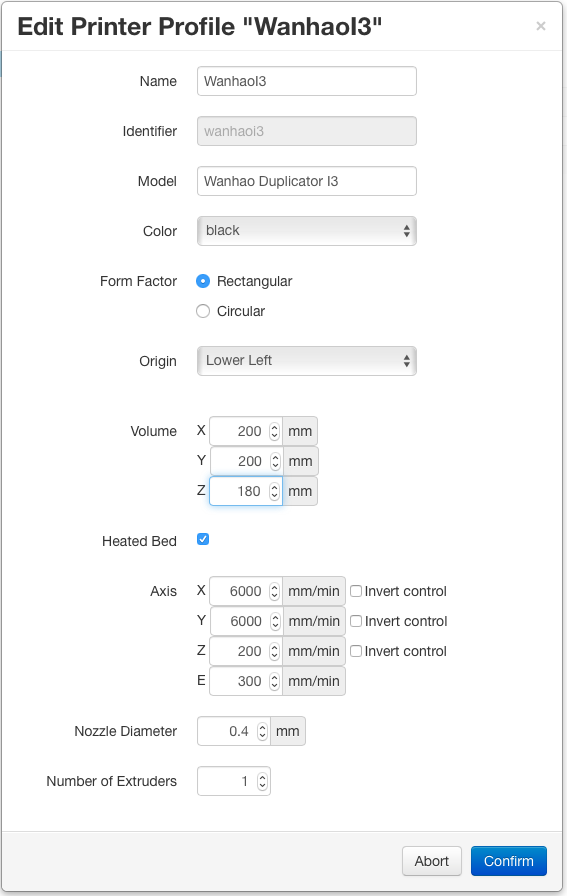
- Printer Profiles
On the Printer Profiles tab, click “Add Profile” and configure as follows:

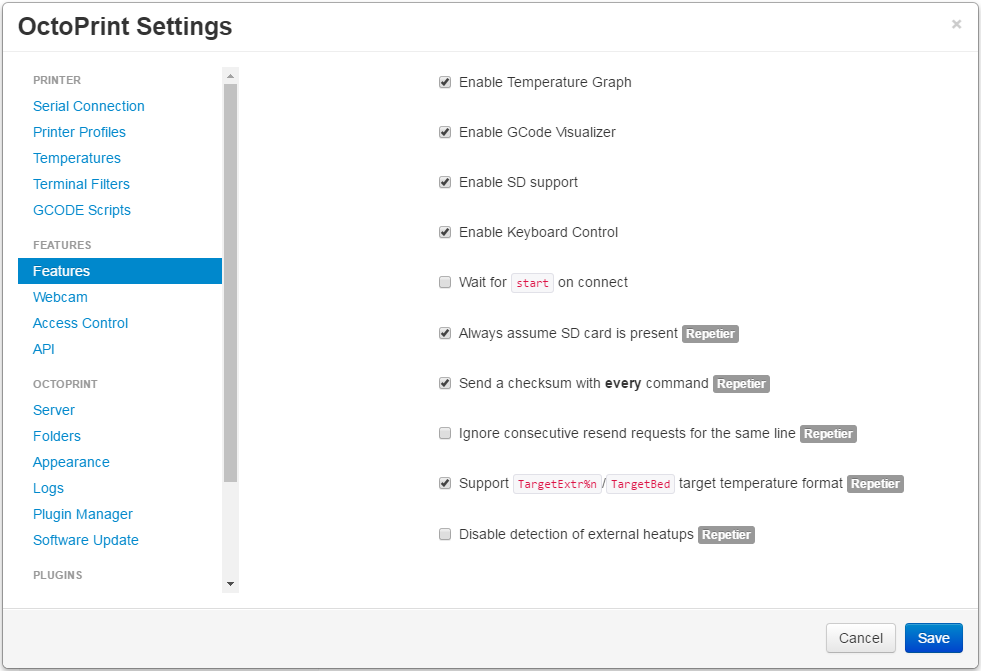
- Features
Check “Always assume SD card is present” if you plan on using the printer’s SD card.


Customizing Octoprint
Octoprint is very flexible and can be customized in many ways through plugins or editing the config.yaml file. Some of the recommended plugins are:
- Print History
- Printer Stats
- Navbar Status
- Title Status
- EEPROM Editor for Repetier
- DisplayZ
- StatusLine
- Autoselect
- Editor Collection
The EEPROM Repetier Editor and Finetunerptr plugins will allow you to edit the EEPROM values through Octoprint when you are not connected to the printer using a PC.
The Editor Collection plugin is very handy for customizing the Control Tab and adding your own buttons for functions like bed leveling, changing filament, Disable Steppers, etc.
Custom Controls in TouchUI interface
By default the Octorprint “Motors Off” button sends out the M18 gcode but Repetier uses M84 to disable the steppers. You can use the “M84 Motors Off” plugin for Octoprint, or create your own button to send this command using the Custom Controls Plugin and create a button that sends the M84 command.
I have also edited my .octoprint/config.yaml file and added some event triggers that will send me notifications via the Pushover app on certain events like Print Started, Print Complete, etc.
events:
 enabled: true
 subscriptions:
 - command: curl -s -F "token=inserttokenhere" -F "user=insertuserid"
 -F "message=Completed {file}" -F "title=OctoPrint" https://api.pushover.net/1/messages.json
 event: PrintDone
 type: system
 - command: curl -s -F "token=inserttokenhere" -F "user=insertuserid"
 -F "message=Printer Connected {port}" -F "title=OctoPrint" https://api.pushover.net/1/messages.json
 event: Connected
 type: system
 - command: curl -s -F "token=inserttokenhere" -F "user=insertuserid"
 -F "message=Print Started {file}" -F "title=OctoPrint" https://api.pushover.net/1/messages.json
 event: PrintStarted
 type: system
 - command: curl -s -F "token=inserttokenhere" -F "user=insertuserid"
 -F "message=GCode Paused {__progress}" -F "title=OctoPrint" https://api.pushover.net/1/messages.json
 event: Paused
 type: gcode