Extruder Gear
This modification applies to all versions of the Duplicator i3.
Description
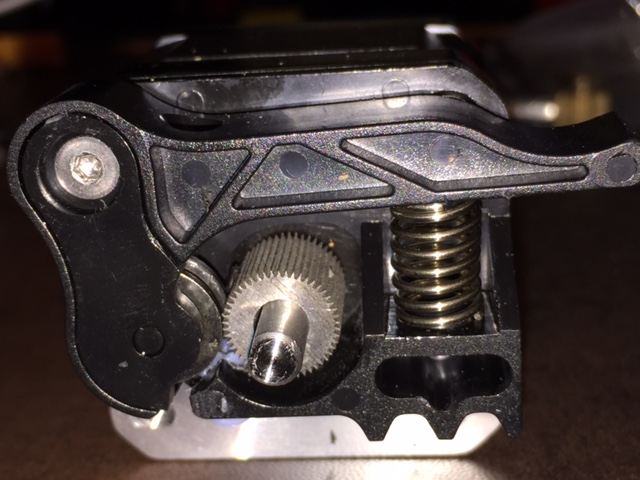
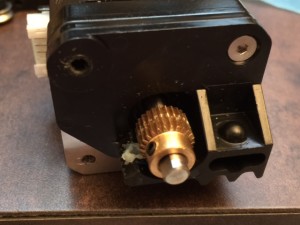
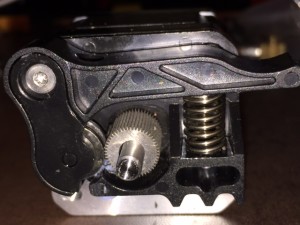
The original extruder gear is made from brass and has large dull teeth spaced far apart. Jetguy did some test prints and found the i3 gear did not print as well at finer detail as the original Duplicator 4 or Flash Forge gears did. Replacing the gear will improve print quality and may help reduce skipping and clogs with its firm grip on the filament. Read More
Materials
- MK9/10 Filament Feed Gear from Uncle Chuck (part# C11-CFFG-01), 3DP2GO or U3DPS, or Stepper Motor Gear (Iron with set screw) from Flashforge. Last time I bought some I got them from 3DSWay on Aliexpress and they were the really sharp ones.
Process
- Unload any filament, let the extruder cool to room temperature, and power off the printer.
- Disassemble the extruder assembly by removing the two screws in the bottom of the extruder fan (the fan the the left of the extruder motor). Be careful not to let the extruder motor fall onto the bed. Unplug the wires from the motor being careful not to damage the plug or the wires.
- Remove the screw holding the extruder tension lever. Hold everything together tightly so the spring doesn’t go flying when the screw comes out.
- (Optional) If you haven’t done so already, you can remove the remaining plastic part of the extruder, and rotate it 90 degrees clockwise and re-attach it. When re-installing the extruder motor, the plug for the wires will now be on the back side of the assembly instead of the top so you can raise the extruder to the full Z limit without rubbing the plug on the top frame.
- Loosen the two set screws holding the brass gear on the motor shaft and remove the brass gear.
- Insert the new gear onto the motor shaft. Align the set screw with the flat part of the shaft and tighten sufficiently.
- Reassemble the extruder assembly following the reverse of the above instructions.
- Perform an estep calibration for the new gear.