
First Layer Settings
Description
One of the most common problems I see people having is with adhesion. One of the most common causes of this problem (other than not leveling the bed tight enough to the extruder) is an improperly configured first layer setting in the slicer.
To obtain good adhesion to the bed, the lines of the first layer need as much surface contact with the bed as they can get. This can be compensated for with a lot of glue spread on the bed, but why not do it right?
The plastic is extruded from the nozzle in a tube shape because it’s being pushed through a round hole. If the nozzle is too high, the “tube” will just be gently laid on the bed and there will be very little surface contact between the plastic and the bed.
You need the nozzle to be lower so the extruded plastic is compressed against the bed to increase the surface contact area.
How do you achieve this? After correct bed leveling, correctly configure the first layer setting in your slicer. A good rule of thumb is for the first layer height to be 90% lower than the other layers. This will extrude the same amount of plastic into a space 10% lower so the plastic will squish flatter against the bed.
(Think about the reverse of that. If the first layer height is set greater than your layer height setting, the plastic is not being compressed at all. It’s not being pressed against the bed. It’s just being gently laid on top of the bed. And that increases the chances of it not sticking to the bed without using a lot of thick adhesive like a glue stick to fill those voids between lines.)
In Cura, the setting is on the “Advanced” tab, in the “Quality” section, and is called “Initial Layer Thickness”. It is set in an absolute value in milimeters so will have to be calculated relative to your layer height. Round to the nearest 0.01.
For a 0.30mm layer height, use 0.27mm Initial Layer Thickness.
For a 0.25mm layer height, use 0.23mm Initial Layer Thickness.
For a 0.20mm layer height, use 0.18mm Initial Layer Thickness.
For a 0.15mm layer height, use 0.14mm Initial Layer Thickness.
for a 0.10mm layer height, use 0.09mm Initial Layer Thickness.
For a 0.05mm layer height, use 0.05 (yes, this is possible on the Di3!)
In Slic3r, the setting is on the “Print Settings” tab, in the “Layers and perimeters” section, and is called “First layer height.” You can enter an absolute value in milimeters or a percentage (include the percent sign in your entry). Set it to 90% and be done. You won’t have to change it again.
In Simplify3D, the setting is on the “Layer” tab of the process settings and is called “First Layer Height.” It is set as a percentage value. Set it to 90% and be done. You won’t have to change it again.
First Layer Height (or Thickness)
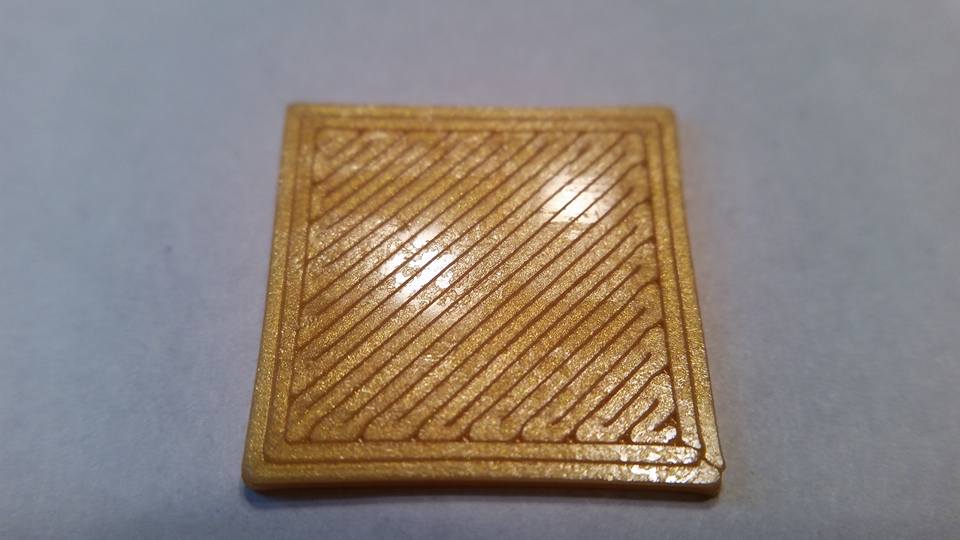
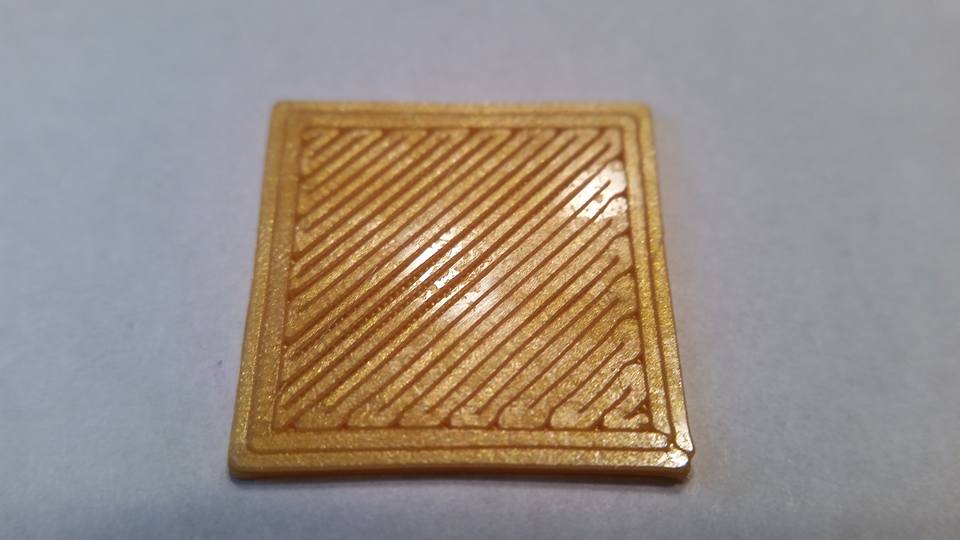
The pictures below show effect of a higher vs lower first layer height. I made a model 20mm square by 1mm tall, made a few slices of it with various combinations of first layer heights and photographed the bottom with a macro lens on my phone.
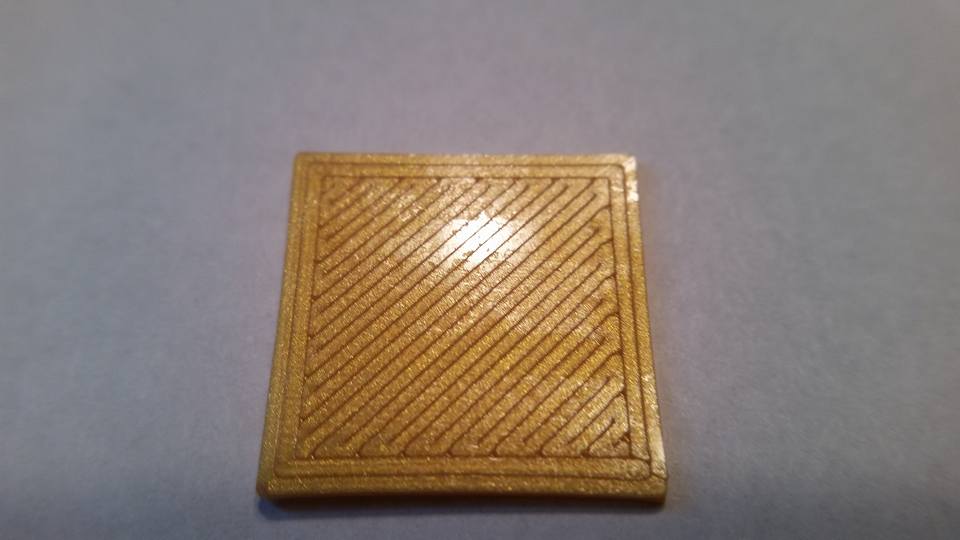
This first picture is what I consider ideal. Perfect adhesion to the bed. Extrusion lines are consistent, tight, and smooth.
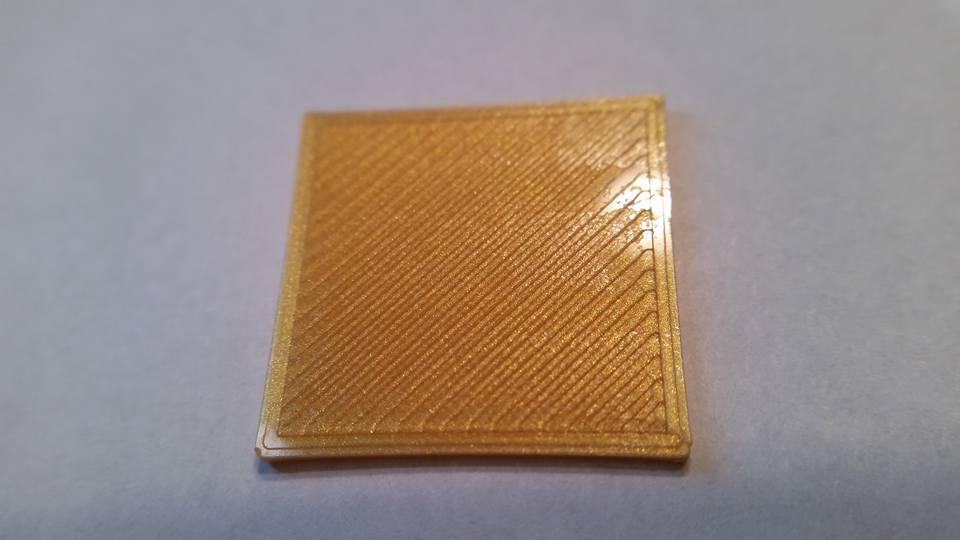
Layer Height: 0.2mm
Initial Layer Thickness: 0.18 (90%)
At 150% initial layer thickness, the lines are not tight and uniform. Bottom is not as smooth. If my bed wasn’t leveled tight, this may not have adhered.
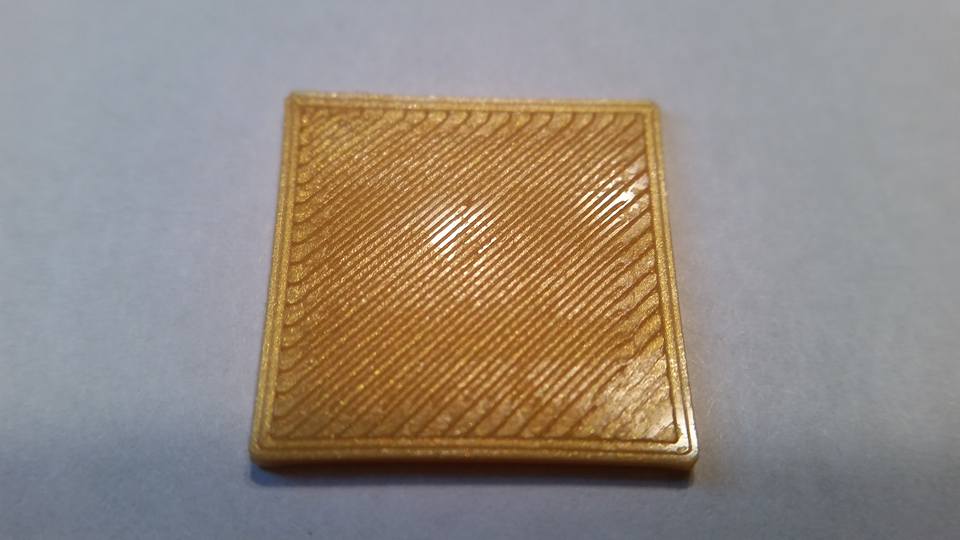
Layer Height: 0.2mm
Initial Layer Thickness: 0.3 (150%)
At 200% initial layer thickness (height), the adhesion was so bad the skirt came loose and got tangled up in the part.
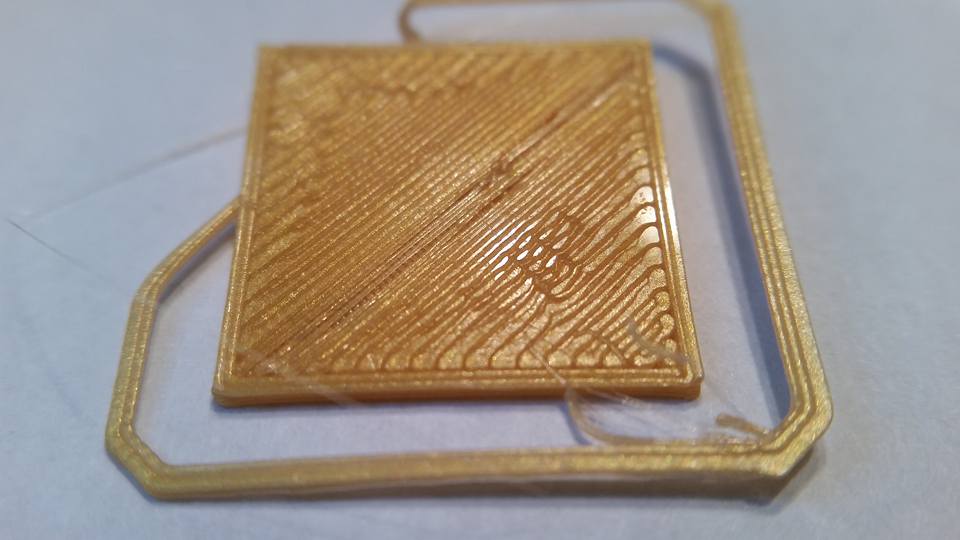
Layer Height: 0.2mm
Initial Layer Thickness: 0.4 (200%)
First Layer Width
An alternative to lowering the height of the first layer is the increase the width. This accomplishes the same goal of filling the available space with plastic so that it squishes flat against the bed for more surface contact. However, this results in thicker lines that may not be as desirable visually.
Layer Height: 0.2mm
Initial Layer Thickness: 0.18 (90%)
Initial Layer Width: 200%
Layer Height: 0.2mm
Initial Layer Height: 0.3mm (150%)
Initial Layer Width: 200%
Layer Height: 0.2mm
Initial Layer Height: 0.4mm (200%)
First layer width: 200%